Make sure to use viem version 2.9.6 or greater. This version contains flow EVM networks
Using viem
Flow networks have been added to viem chain definitions viem networks. This allows for convenient flow network configuration when using viem and wagmi.
Viem Flow Config
The configuration below uses Flow Testnet. Since this configuration is already in viem various properties are already set, like block explorer and json-rpc endpoint. See how this configuration is used in a nextjs wagmi web application below.
_11import { http, createConfig } from '@wagmi/core';_11import { flowTestnet } from '@wagmi/core/chains';_11import { injected } from '@wagmi/connectors';_11_11export const config = createConfig({_11 chains: [flowTestnet],_11 connectors: [injected()],_11 transports: {_11 [flowTestnet.id]: http(),_11 },_11});
Using Next.js and Wagmi
This tutorial will guide you through creating a simple web application, connect to an EVM capable wallet and interact with the "HelloWorld" smart contract to get and set greetings. We will not dive into managing transactions.
Prerequisites
- Node.js installed on your machine
- A code editor (e.g., Visual Studio Code)
- Basic knowledge of React and Next.js
Step 1: Setting Up the Next.js Project
This tutorial will be following Wagmi getting-started manual tutorial
First, let's create a Wagmi project named flow-evm-wagmi. We will use npm but you are welcome to use yarn or bun.
_10npm create wagmi@latest_10_10# project name flow-evm-wagmi_10# Select 'React' then 'next'
After Wagmi automatic installation procedure.
_10cd flow-evm-wagmi_10npm install
Step 2: Configuring Wagmi and Connecting the Wallet
Make sure you have Metamask installed and Flow network configured. Metamask and Flow blockchain. Wagmi needs to know what networks to be aware of. Let's configure to use Flow Testnet by updating config.ts file with the following:
_11import { http, createConfig } from '@wagmi/core';_11import { flowTestnet } from '@wagmi/core/chains';_11import { injected } from '@wagmi/connectors';_11_11export const config = createConfig({_11 chains: [flowTestnet],_11 connectors: [injected()],_11 transports: {_11 [flowTestnet.id]: http(),_11 },_11});
By default Wagmi configures many wallets, MetaMask, Coinbase Wallet, and WalletConnect as wallet providers. Above we simplify the code to only be interested in the Injected Provider, which we are interested in Metamask. Verify page.tsx code looks like the following.
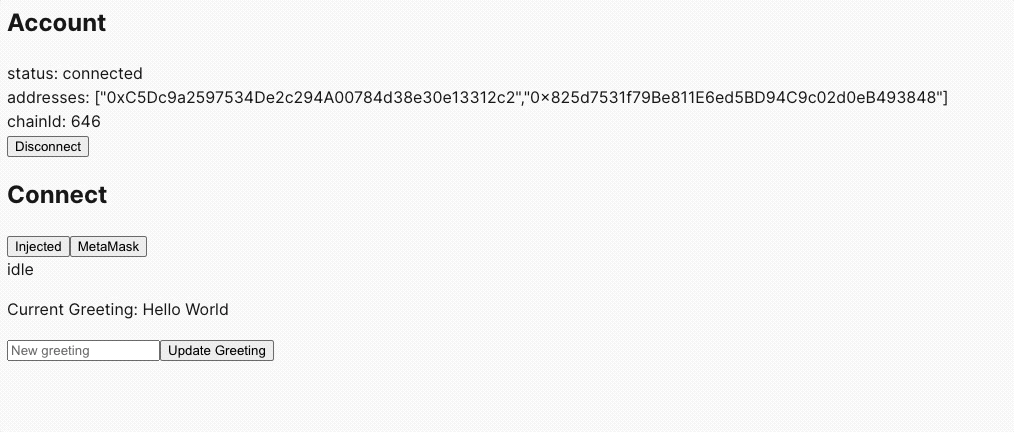
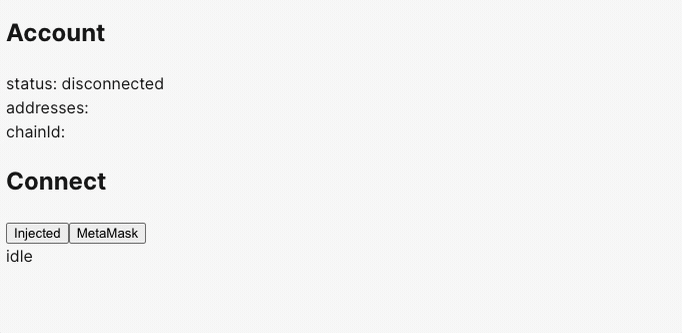
_47'use client'_47_47import { useAccount, useConnect, useDisconnect } from 'wagmi'_47_47function App() {_47 const account = useAccount()_47 const { connectors, connect, status, error } = useConnect()_47 const { disconnect } = useDisconnect()_47_47 return (_47 <>_47 <div>_47 <h2>Account</h2>_47_47 <div>_47 status: {account.status}_47 <br />_47 addresses: {JSON.stringify(account.addresses)}_47 <br />_47 chainId: {account.chainId}_47 </div>_47_47 {account.status === 'connected' && (_47 <button type="button" onClick={() => disconnect()}>_47 Disconnect_47 </button>_47 )}_47 </div>_47_47 <div>_47 <h2>Connect</h2>_47 {connectors.map((connector) => (_47 <button_47 key={connector.uid}_47 onClick={() => connect({ connector })}_47 type="button"_47 >_47 {connector.name}_47 </button>_47 ))}_47 <div>{status}</div>_47 <div>{error?.message}</div>_47 </div>_47 </>_47}_47_47export default App
This step relies on an already deployed HelloWorld contract. See Using Remix to deploy a smart contract on flow evm blockchain.
Create or edit the simple page.tsx file in the app directory to have better styles, that's beyond this tutorial. We will modify page.txs to add a new HelloWorld.tsx. Replace YOUR_CONTRACT_ADDRESS with your deployed address.
Step 3: Creating the Interface for HelloWorld Contract
Now, let's create a component to interact with the HelloWorld contract. Assume your contract is already deployed, and you have its address and ABI.
- Create a new file, HelloWorld.ts, in the components directory.
- Use Wagmi's hooks to read from and write to the smart contract:
_47import { useState } from 'react';_47import {_47 useContractRead,_47 useContractWrite,_47 useAccount,_47 useConnect,_47} from 'wagmi';_47import contractABI from './HelloWorldABI.json'; // Import your contract's ABI_47_47const contractAddress = 'YOUR_CONTRACT_ADDRESS';_47_47const HelloWorld = () => {_47 const [newGreeting, setNewGreeting] = useState('');_47 const { address, isConnected } = useAccount();_47 const { connect } = useConnect();_47_47 const { data: greeting } = useContractRead({_47 addressOrName: contractAddress,_47 contractInterface: contractABI,_47 functionName: 'hello',_47 });_47_47 const { write: changeGreeting } = useContractWrite({_47 addressOrName: contractAddress,_47 contractInterface: contractABI,_47 functionName: 'changeGreeting',_47 args: [newGreeting],_47 });_47_47 if (!isConnected) {_47 return <button onClick={() => connect()}>Connect Wallet</button>;_47 }_47_47 return (_47 <div>_47 <p>Current Greeting: {greeting}</p>_47 <input_47 value={newGreeting}_47 onChange={(e) => setNewGreeting(e.target.value)}_47 placeholder="New greeting"_47 />_47 <button onClick={() => changeGreeting()}>Update Greeting</button>_47 </div>_47 );_47};_47_47export default HelloWorld;
Reminder: aReplace YOUR_CONTRACT_ADDRESS with the actual address of your deployed HelloWorld contract.
Also notice you need the HelloWorld contract ABI, save this to a new file called HelloWorld.json in the app directory.
_48{_48 "abi": [_48 {_48 "inputs": [],_48 "stateMutability": "nonpayable",_48 "type": "constructor"_48 },_48 {_48 "inputs": [_48 {_48 "internalType": "string",_48 "name": "newGreeting",_48 "type": "string"_48 }_48 ],_48 "name": "changeGreeting",_48 "outputs": [],_48 "stateMutability": "nonpayable",_48 "type": "function"_48 },_48 {_48 "inputs": [],_48 "name": "greeting",_48 "outputs": [_48 {_48 "internalType": "string",_48 "name": "",_48 "type": "string"_48 }_48 ],_48 "stateMutability": "view",_48 "type": "function"_48 },_48 {_48 "inputs": [],_48 "name": "hello",_48 "outputs": [_48 {_48 "internalType": "string",_48 "name": "",_48 "type": "string"_48 }_48 ],_48 "stateMutability": "view",_48 "type": "function"_48 }_48 ]_48}
Step 4: Integrating the HelloWorld Component
Finally, import and use the HelloWorld component in your pages.tsx, throw it at the bottom of the render section.
_22import HelloWorld from './helloWorld'_22_22 // put at the bottom of the Connect section._22 <div>_22 <h2>Connect</h2>_22 {connectors.map((connector) => (_22 <button_22 key={connector.uid}_22 onClick={() => connect({ connector })}_22 type="button"_22 >_22 {connector.name}_22 </button>_22 ))}_22 <div>{status}</div>_22 <div>{error?.message}</div>_22 </div>_22_22 // 👇👇👇👇👇👇👇👇👇👇👇_22 <div>_22 <HelloWorld />_22 </div>
Now, you have a functional App that can connect to Metamask, display the current greeting from the "HelloWorld" smart contract, and update the greeting.
Test it by updating the greeting, signing a transaction in your Metamask then wait a minute then refresh the website. Handling transactions are outside of this tutorial. We'll leave that as a future task. Checkout Wagmi documentation